Bulk Scheduling
Bulk Scheduling plans a run of Stories for one account in a single table, so you can set the times for a whole week without opening each post on its own.
Building a bulk schedule
Step 1: Open Bulk Scheduling from the left menu.
Step 2: Choose the account you are scheduling for from the selector at the top. It opens a search box with your accounts listed underneath, grouped by platform, so you can type a few letters to narrow down a long list. Add account at the bottom of the list connects a new one without leaving the page.
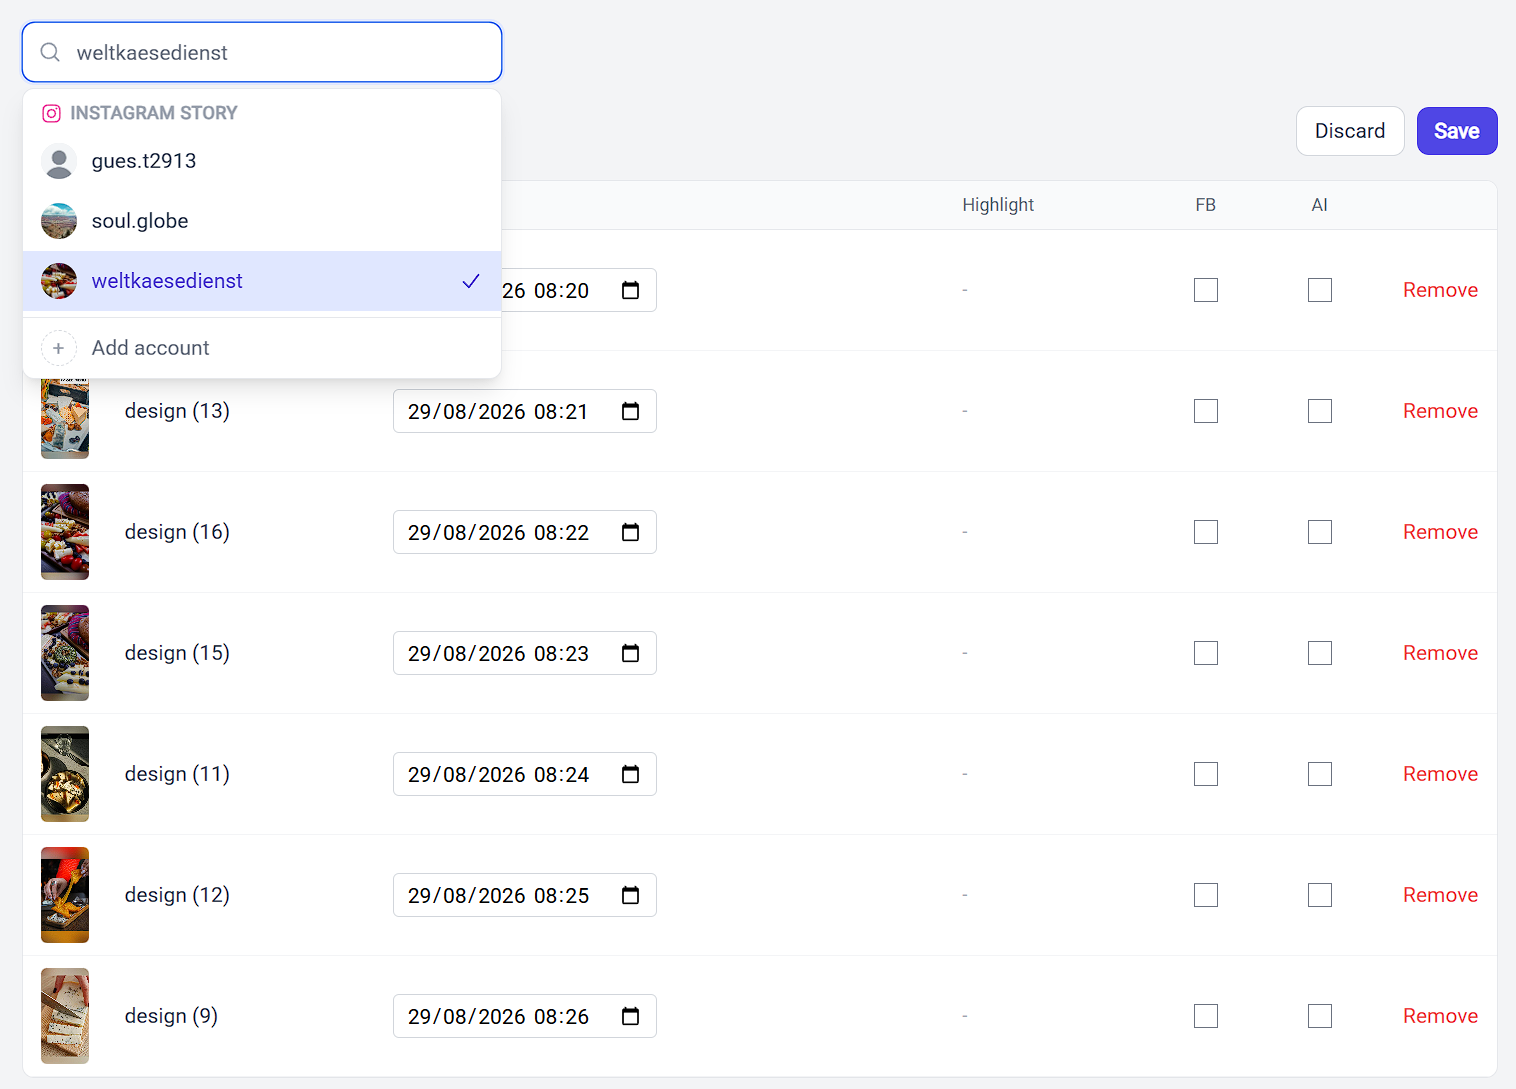
The table applies to whichever account is shown in the selector. To plan a run for a second account, save the first one, then switch accounts.
Step 3: Click + Add from gallery.
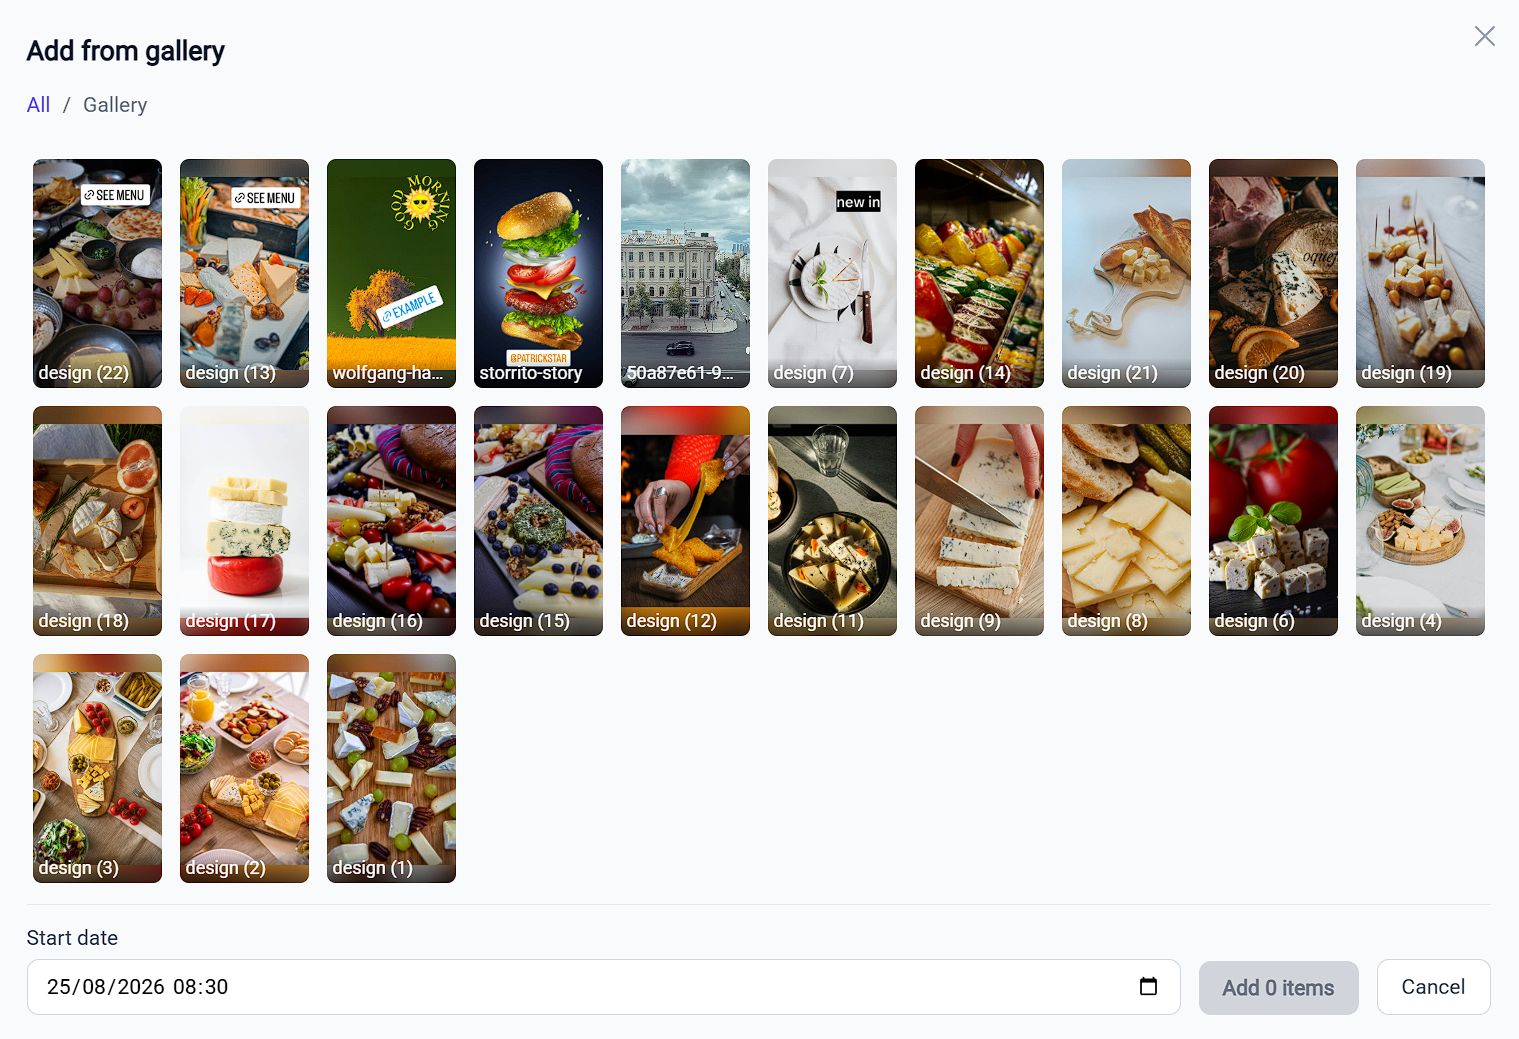
Step 4: Click the media you want to schedule. Each item you pick gets a check mark and collects in the Selected tray underneath, in the order you chose them. The small x on a thumbnail in that tray takes it back out. Use the All / Gallery breadcrumb at the top to move between folders, and note that archived items don't appear here.
Step 5: Set Start date at the bottom of the dialog to the date and time the first post should go out.
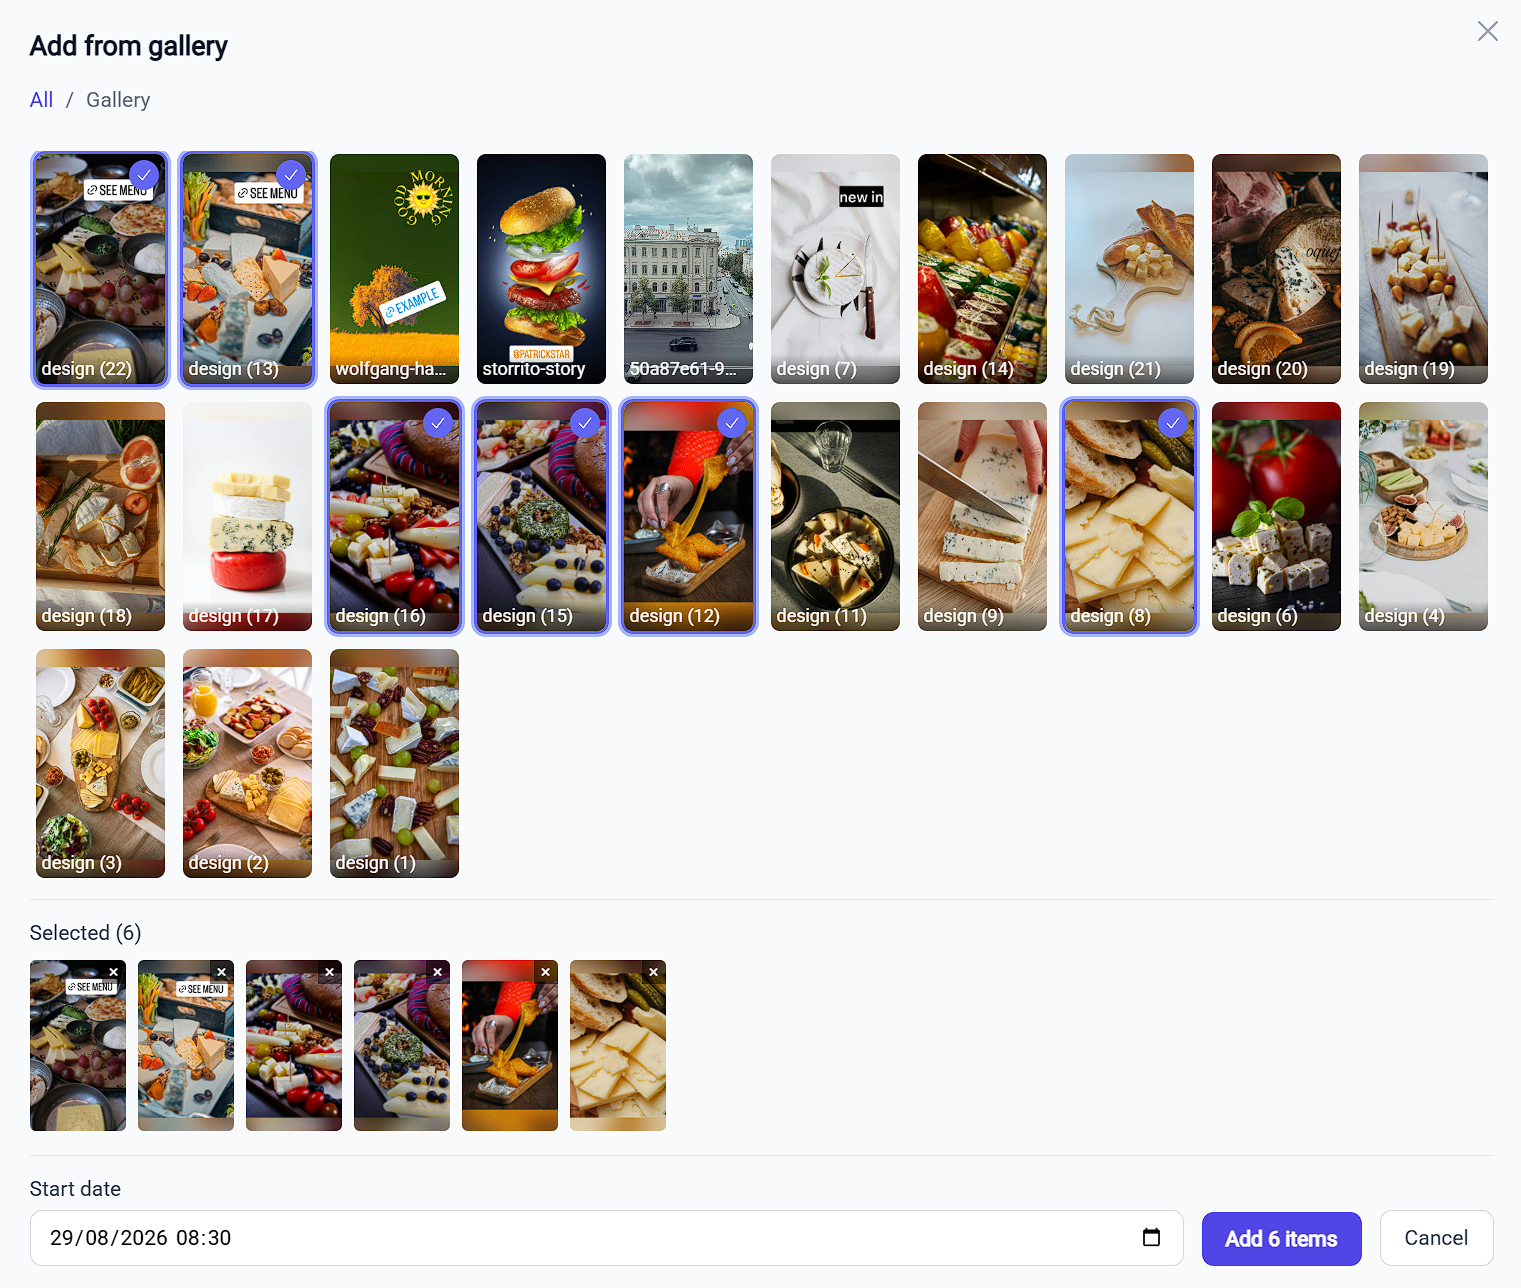
Step 6: Click Add N items. The button counts what you picked, so it reads Add 6 items for six.
Step 7: Check the Post date on each row. Rows are spaced forward from the start date you set, so adjust any that need a different time. Post dates must be in the future, and a row you re-date moves to its new place in the table.
The table splits the run into story lines: a separator shows where a new day starts (MON, SEP 2) or where there is a longer break between posts (+4 H 28 MIN). Posts published within about half an hour of each other belong to the same line — even across midnight.
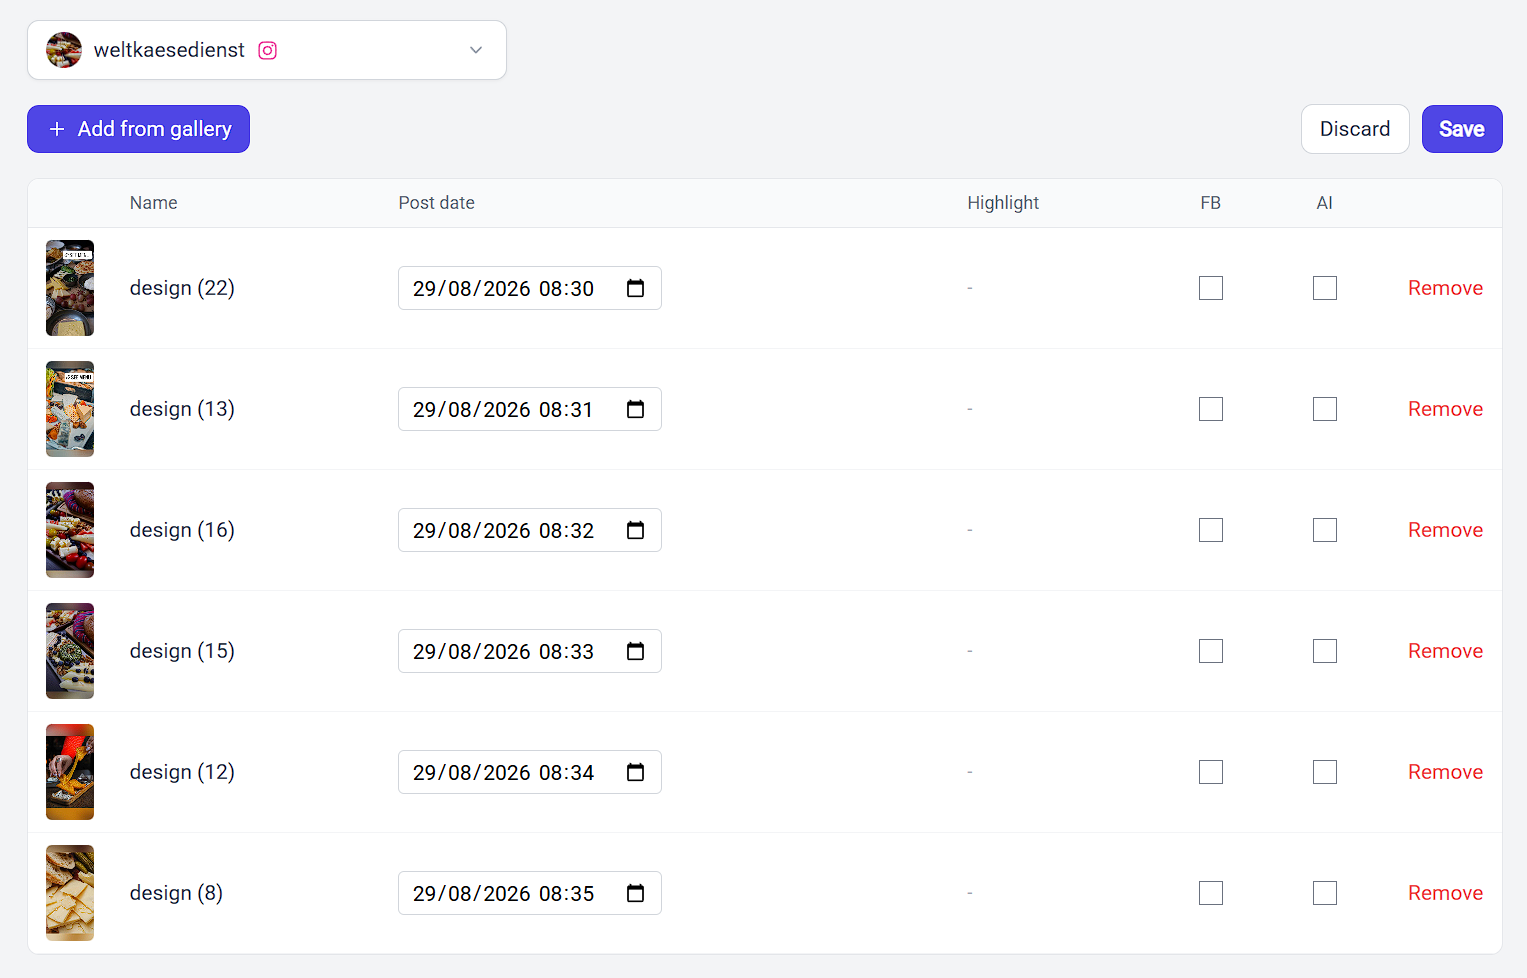
Step 8: Set the per-row options. Each row carries three:
- Highlight — saves the Story to a Highlight album as well as posting it. Accounts with no Highlight albums show a dash instead of a dropdown
- FB — crossposts the Story to the Facebook Page or profile linked to that account
- AI — labels the post as AI-generated. See How To Label AI-Generated Content
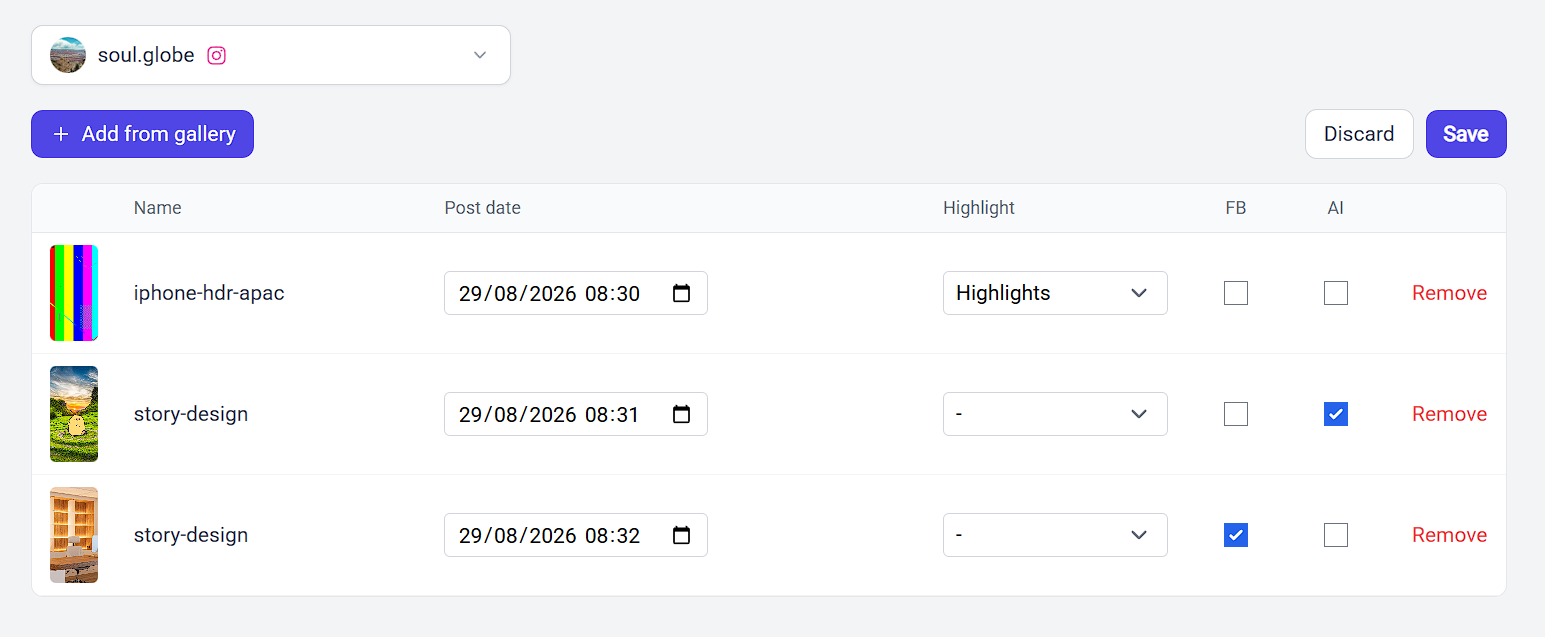
To set FB or AI on a run of rows at once, tick the first box, then hold Shift and tick the last one.
Step 9: Click Save. Nothing is scheduled until you do, so don't leave the page before saving. Discard throws away every unsaved change on the table.
Selecting several posts
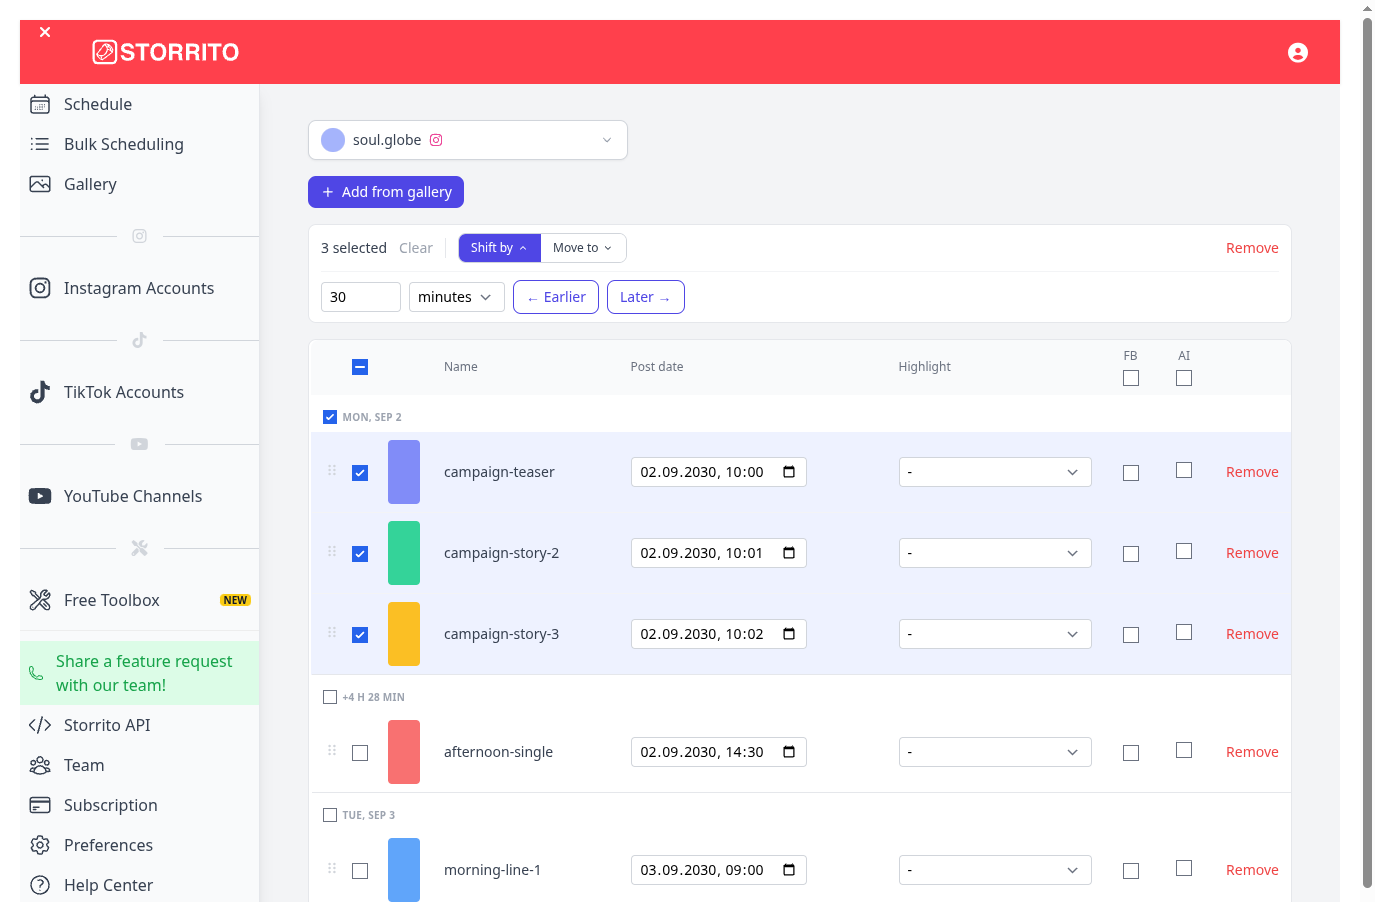
Tick the checkbox at the start of a row, or hold Shift and click a second checkbox to select the whole range between them. The checkbox on a separator selects that entire story line with one click, and the checkbox in the table header selects every post in the table.
While posts are selected, a toolbar appears above the table with the tools described below. Clear empties the selection again.
Shifting times
Open Shift by in the toolbar, enter an amount, pick minutes, hours, days or months, and click ← Earlier or Later →. Each click moves every selected post by that amount while the gaps between them stay the same — click again to nudge further, or click the other direction to undo a shift.
Moving a run to a new time
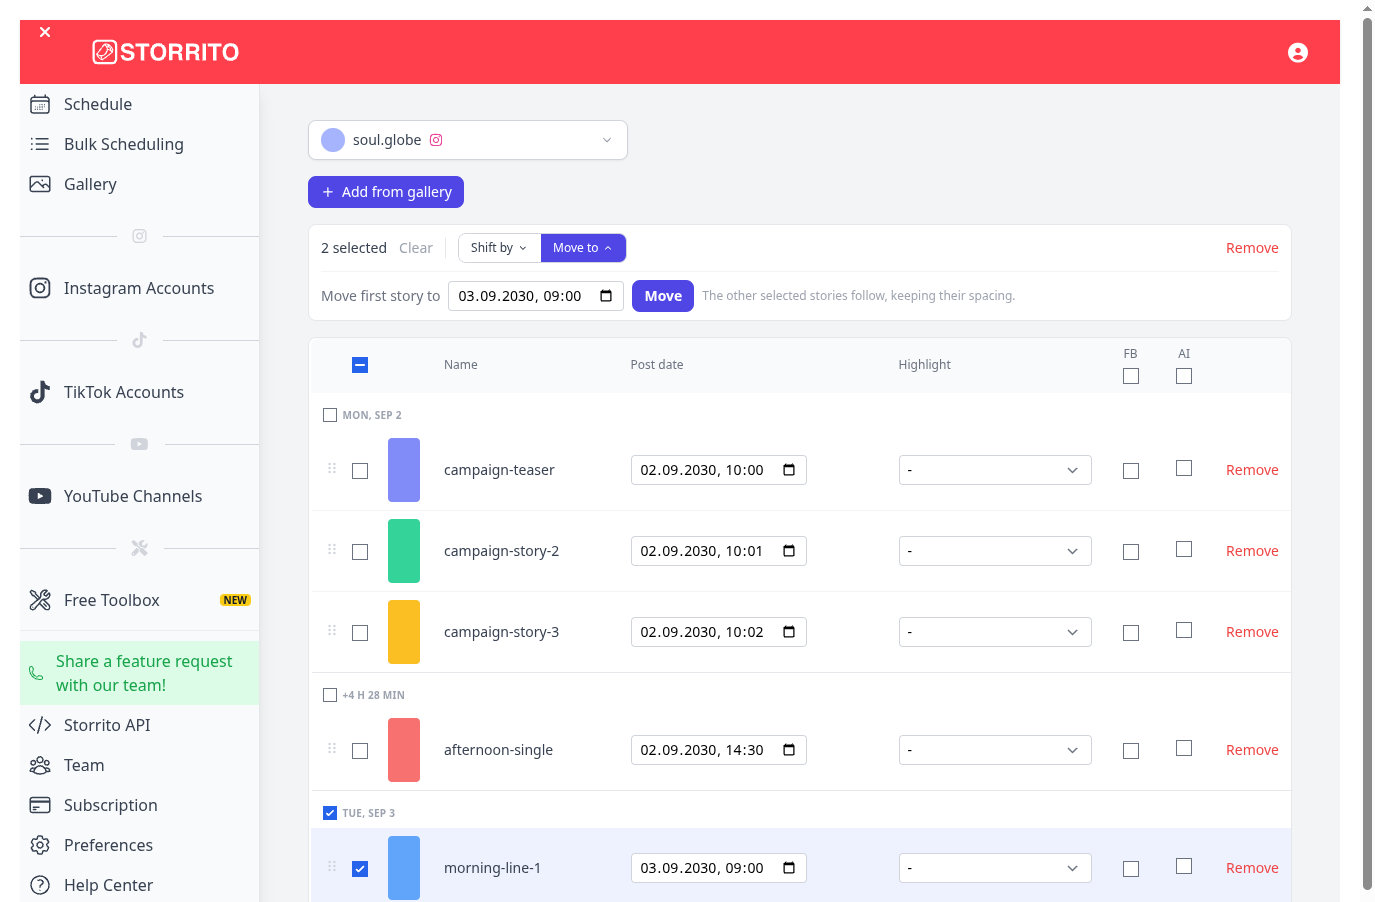
Open Move to, pick the new date and time, and click Move. The earliest selected post lands exactly on that time and the other selected posts follow, keeping their spacing. The date field starts on the current time of your first selected post, so you only change what should differ.
Rearranging posts
Drag a row by the grip at its left edge to another position. The time slots keep their times — the posts swap places between them, so the rhythm of the run stays intact. Click the Post date column header to sort the table ascending or descending.
Reviewing before you save
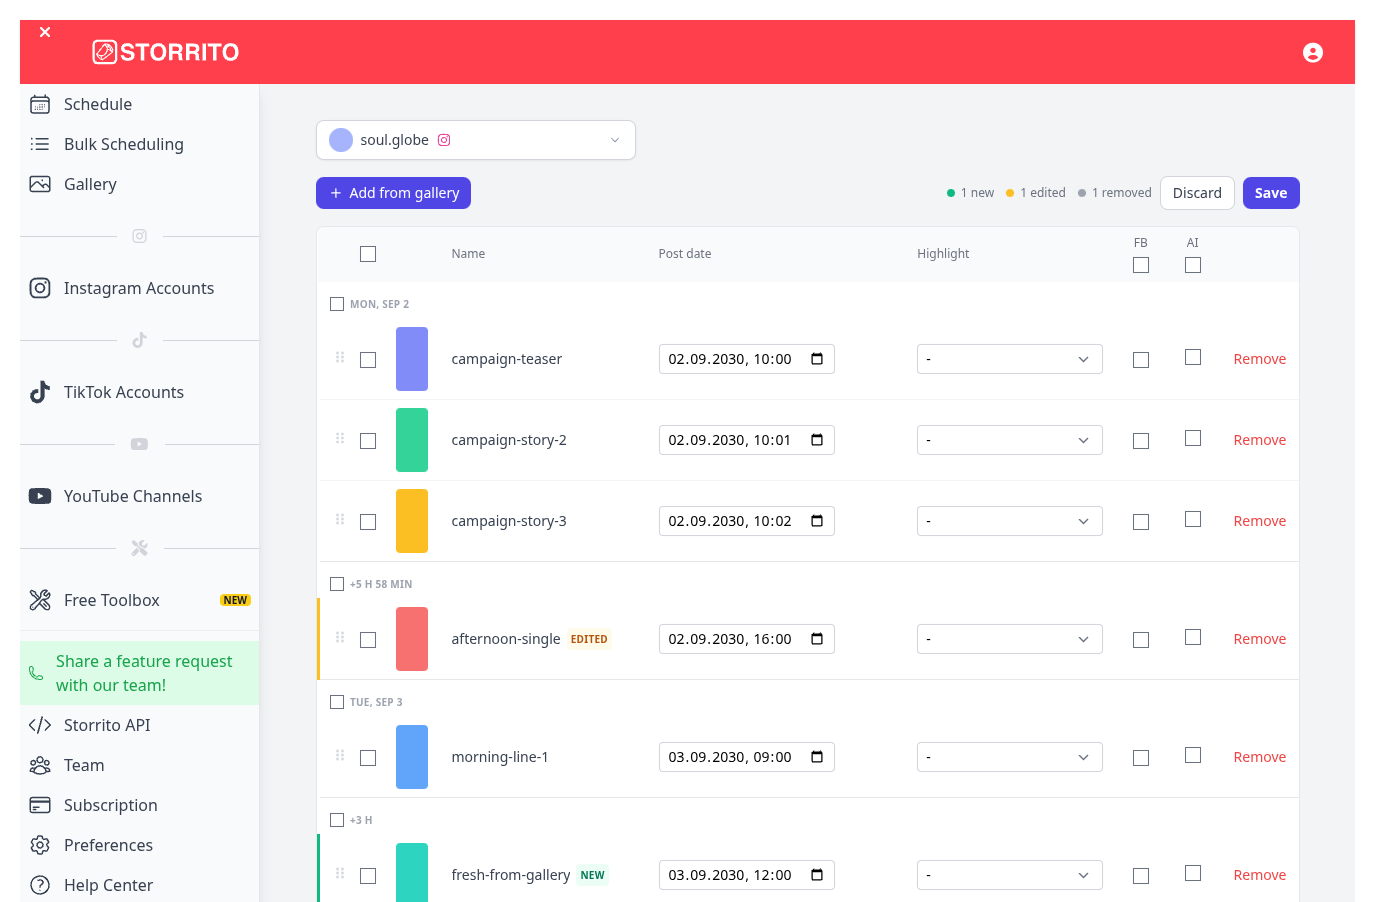
Added posts are marked NEW and re-scheduled ones EDITED, and the summary next to Save counts what the save will do — including removed posts, which stay invisible until then. A post date in the past shows an error on the row and disables Save until it is corrected. Two posts on the same minute block saving in the same way — the row shows an error with a Move to next free minute button that fixes it in one click.
Removing a post from the run
Remove at the end of a row takes that post out of the table; Remove in the selection toolbar takes out every selected post at once. Like every other change here, it only takes effect once you click Save — Discard brings removed posts back.
To cancel Stories that are already scheduled, see How To Cancel Or Delete Stories.
For the credit rules that apply to every scheduled post, see How Scheduling Works In Storrito, and for scheduling one post at a time with the full set of options, see How To Schedule Instagram Stories And Reels.
Tools
- Subtitle overlay
- Auto Post Instagram Stories
- How to Upload a Video to Instagram Story from PC
- Schedule Instagram Stories with the Link Sticker
- Instagram bio generator
- Upload and post Instagram Reels from PC
- Subtitle generator
- Instagram grid maker
- Schedule Instagram Stories
- Turn an MP3 into an Instagram Story video
- Can you schedule Instagram stories? Yes, with Storrito.com! (Here's How)
- Instagram Story bingo generator
- Storrito toolbox
- Instagram Story Planner (Scheduler)
- Instagram font generator
- Instagram Story 'this or that' generator
- Schedule Facebook Stories from PC
- Instagram Story Maker Online
- Trim a video
- Instagram carousel maker
- PDF to Instagram carousel
- How to schedule Instagram Reels
- How to add a story in Instagram from PC or Mac?
- Post Instagram Stories from PC
- Instagram Story tier list generator