How To Schedule Instagram Stories And Reels
Instagram Stories and Instagram Reels are two separate destinations in Storrito, and you can schedule to either or both from the same page. This guide covers the options each one offers.
Before you start, you need a connected Instagram account. Go to Instagram Accounts in the left menu and click Connect Account. See the Quick Start Guide if you haven't done this yet.
Step by step
Step 1: Get your media into Storrito. On the Schedule page, click + New Story to design something in the editor, or Upload to add an existing image or video. Uploads drop you into the Gallery when they finish.
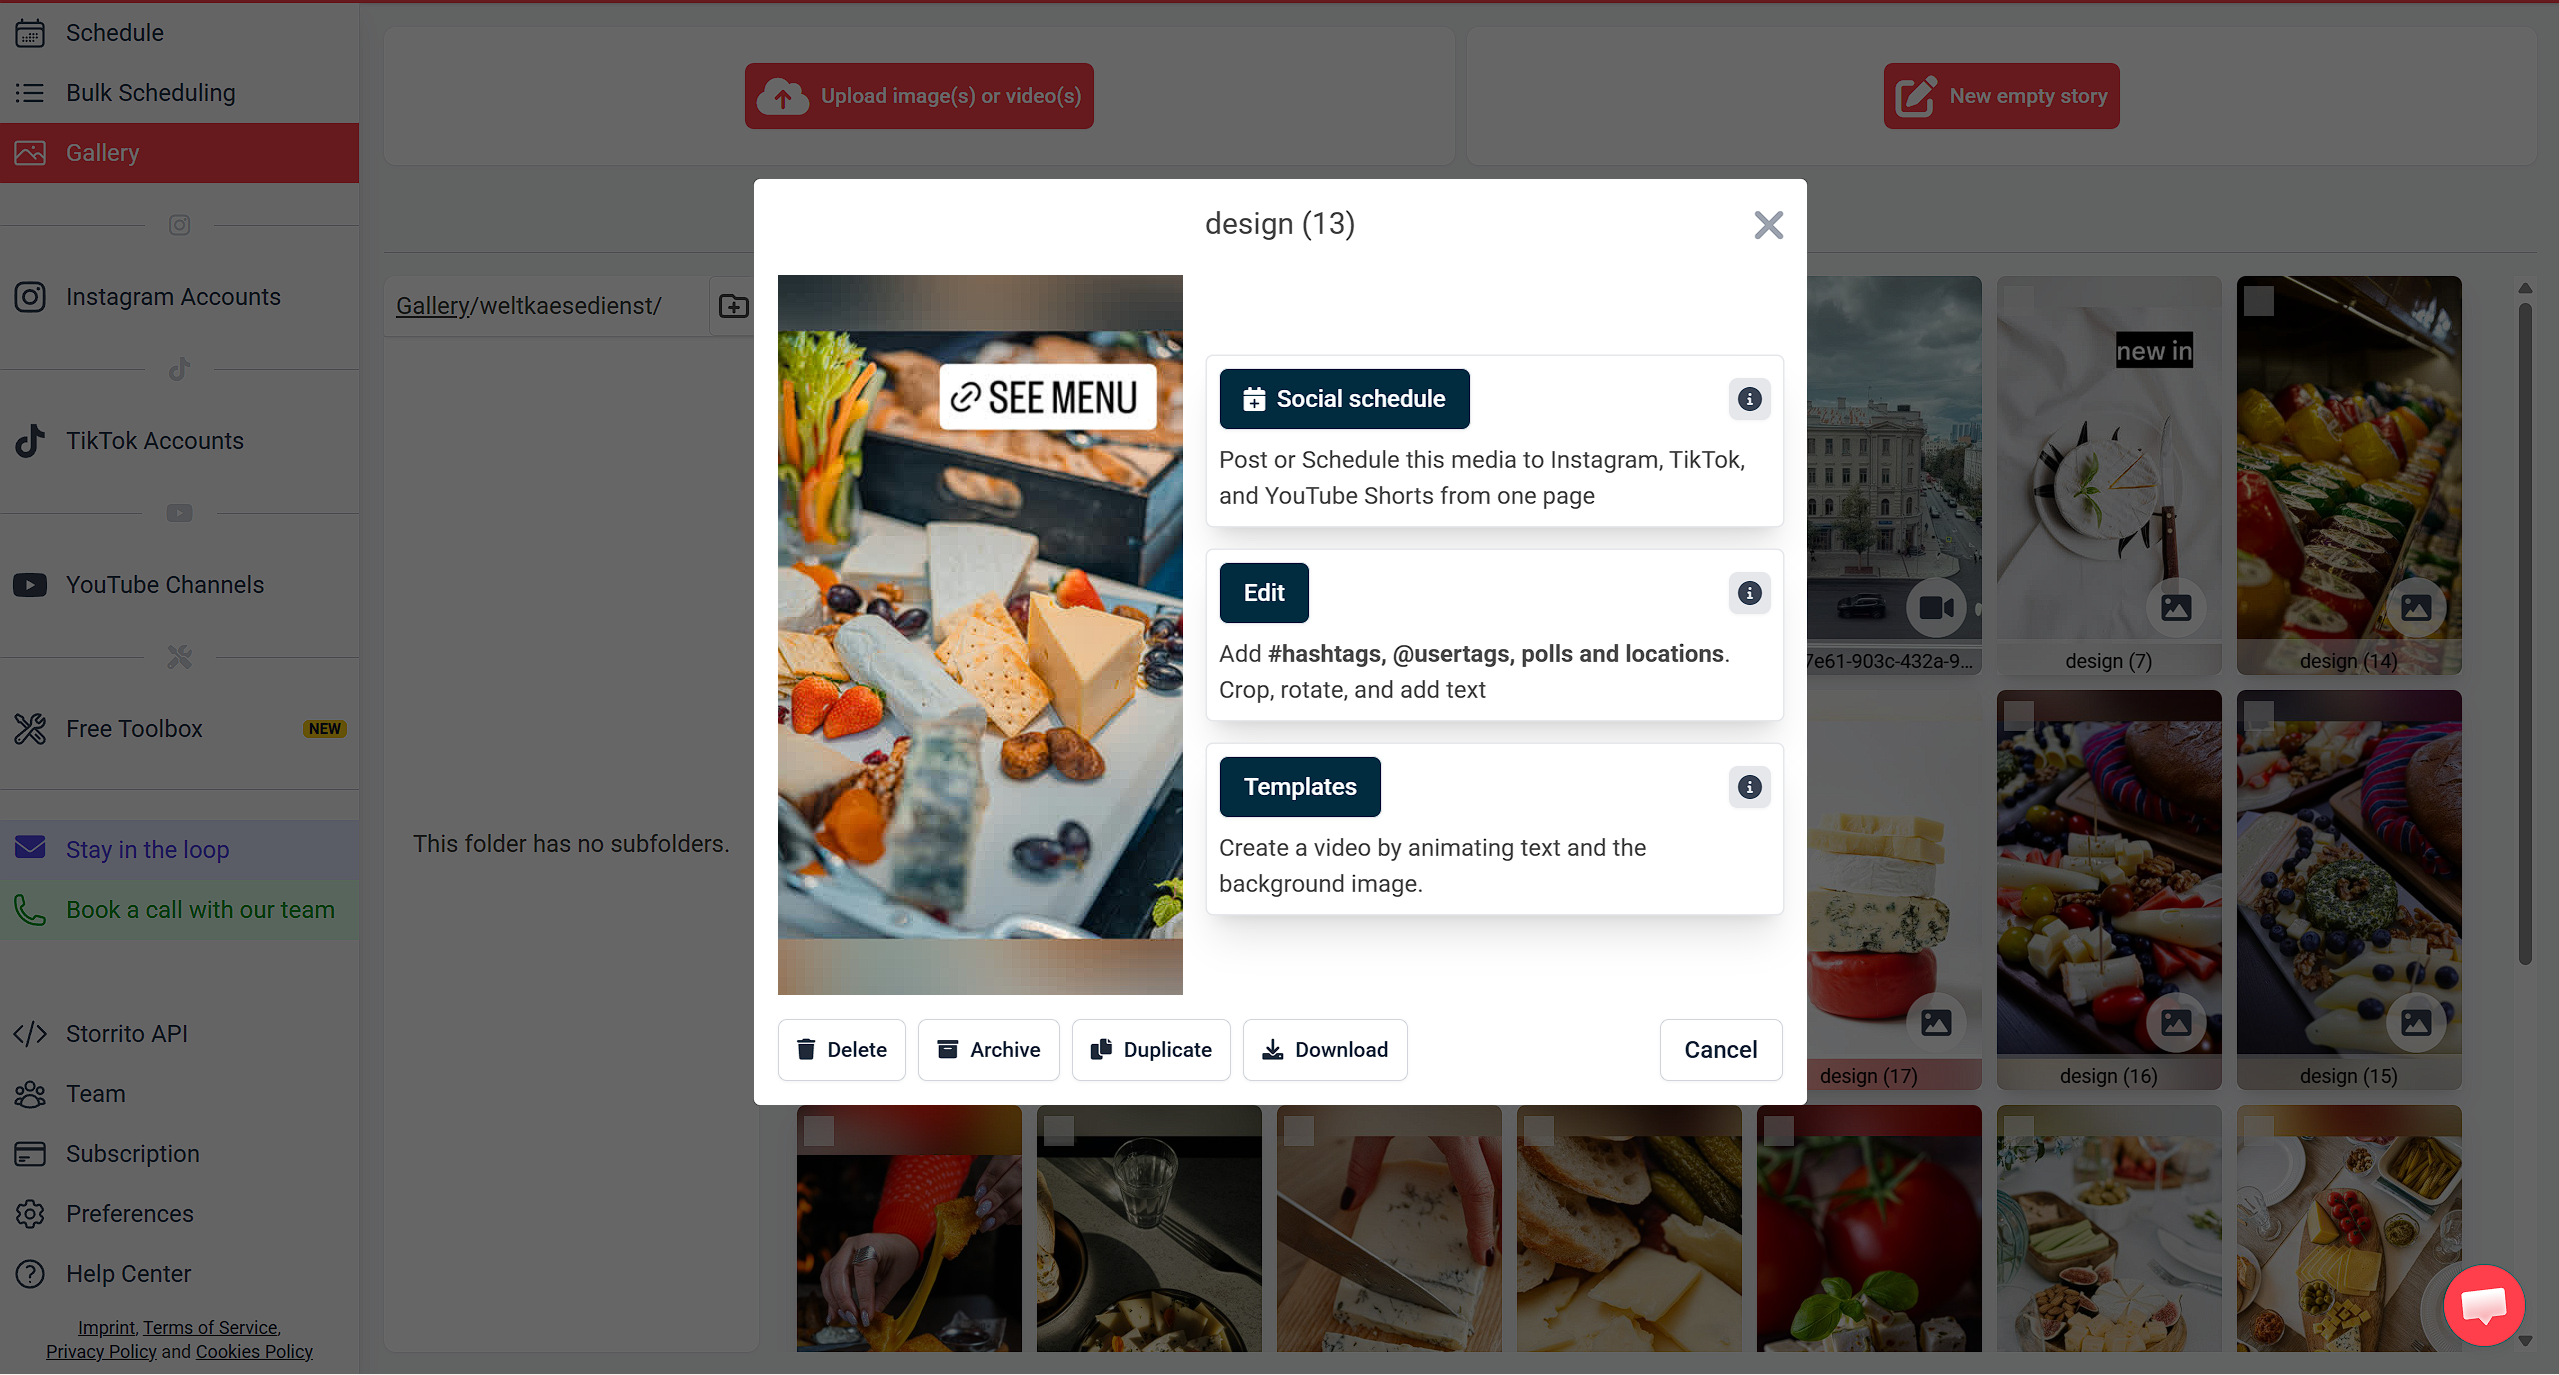
Step 2: Open the scheduling page. From the editor, click Share in the top right and choose Schedule story. From the Gallery, click your media and choose Social schedule.
Step 3: Under Social accounts, click Select social accounts.... Your Instagram account appears twice — once under Instagram Stories and once under Reels. Tick whichever you want. You can tick both, and you can add other accounts at the same time.
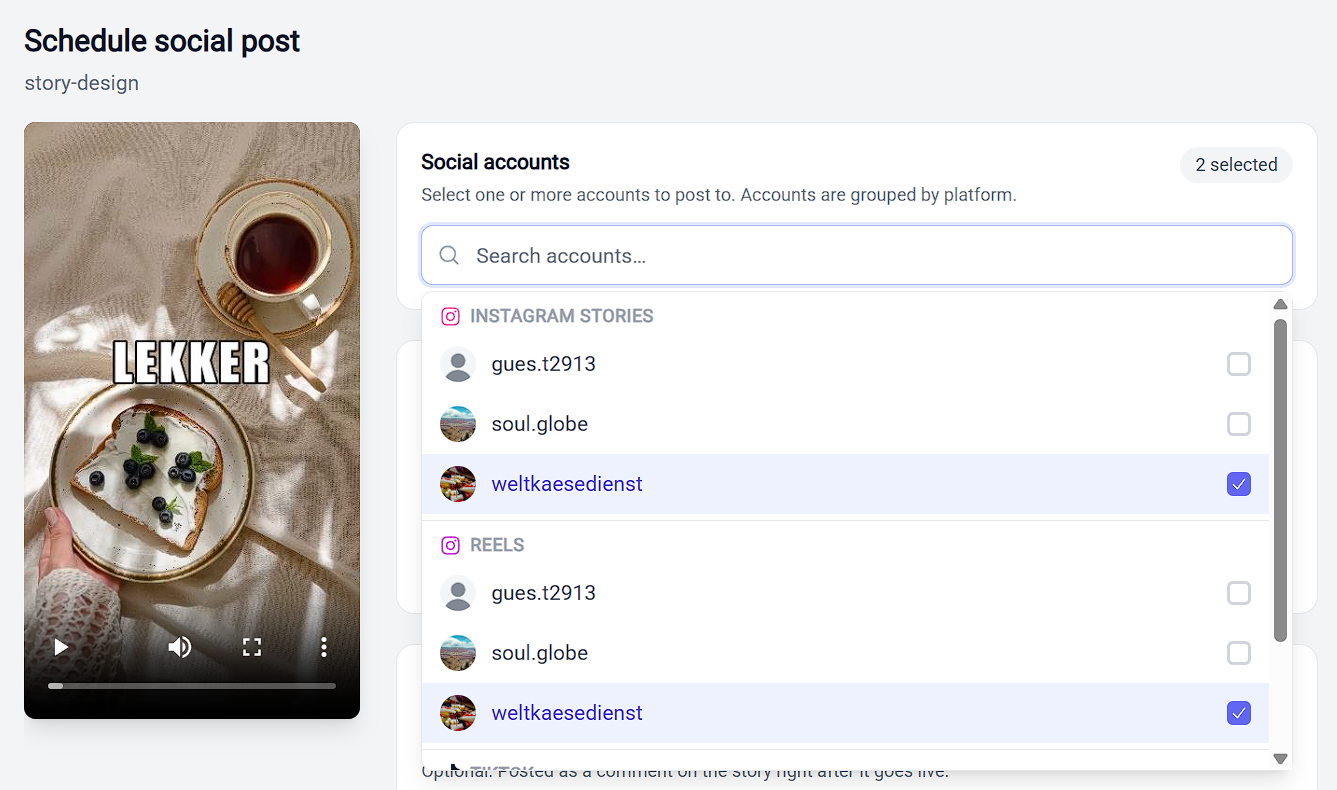
Reels need a video. If your media is an image, every Reels entry is greyed out with Instagram Reels require video media. underneath it.
Step 4: Fill in the options card for each destination you picked. These are covered below.
Step 5: Set Date & time and click the button underneath. Leaving the date untouched posts immediately; changing it schedules for later. See How Scheduling Works In Storrito for the full explanation.
Instagram Story options
Everything in this card is optional. The top of the card applies to the Story itself:
- First comment — text posted as a comment on the Story right after it goes live
- AI-generated content — labels the Story as AI-generated on Instagram. See How To Label AI-Generated Content
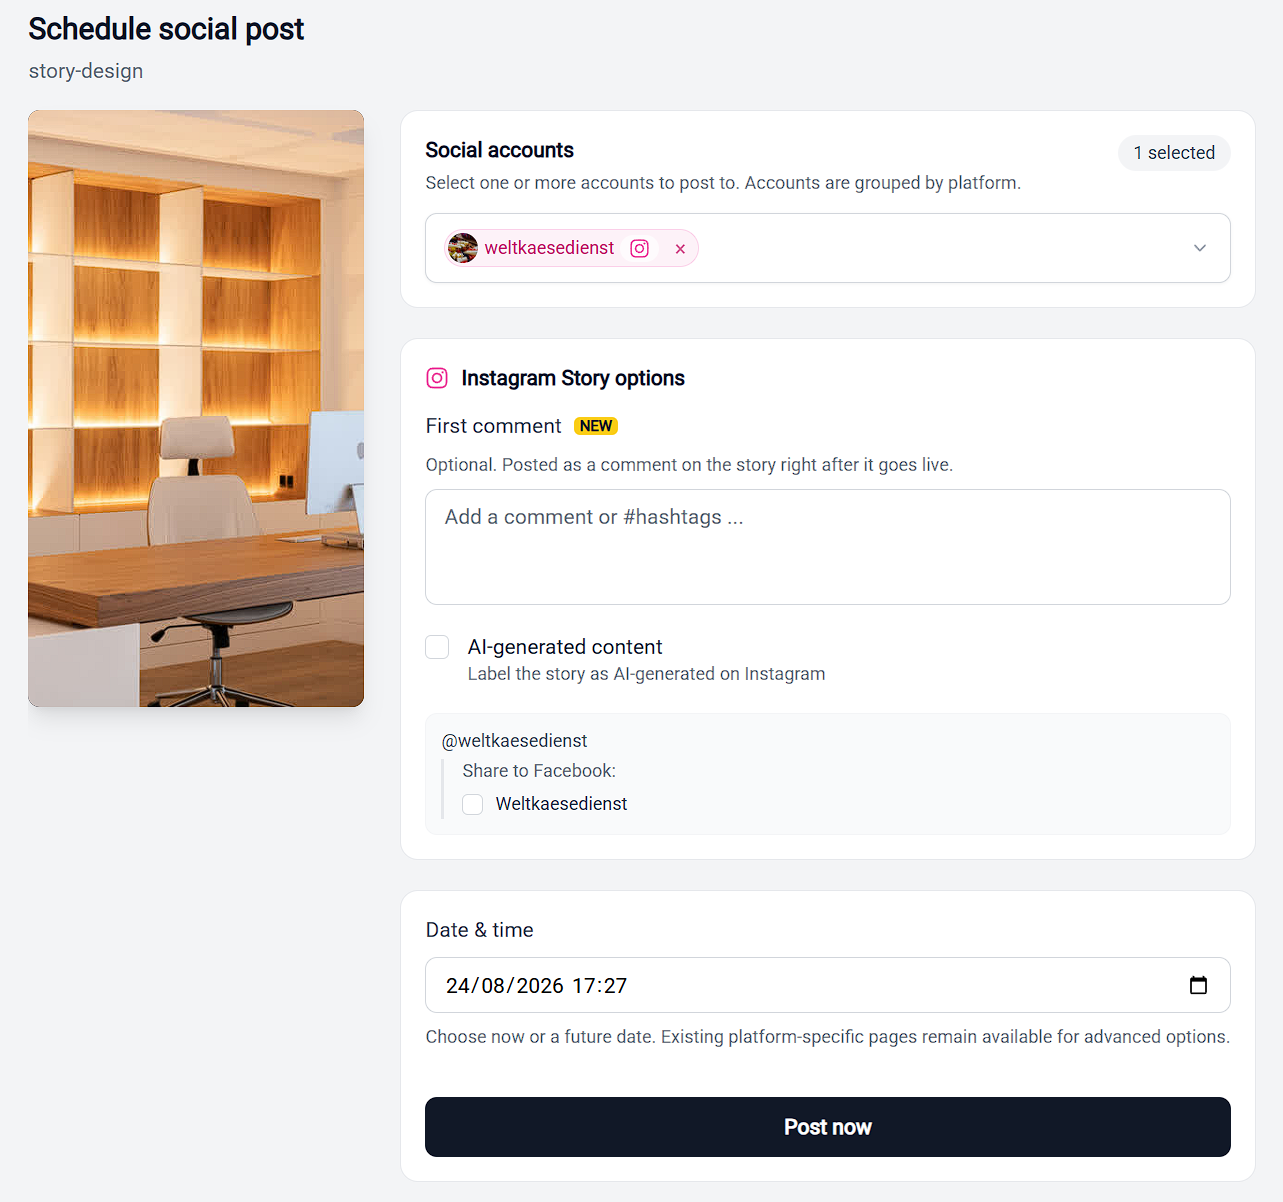
Below that, each Instagram account you selected gets its own block, headed by its @username, holding the settings that apply to that account alone. Both rows below appear only when they're relevant, so two accounts in the same post can show different things:
- Share to Facebook — appears only if that account has a Facebook Page or profile linked. If the row is missing entirely, Storrito has no Facebook link on file for that account. See How To Set Up Facebook Crossposting For Instagram Stories
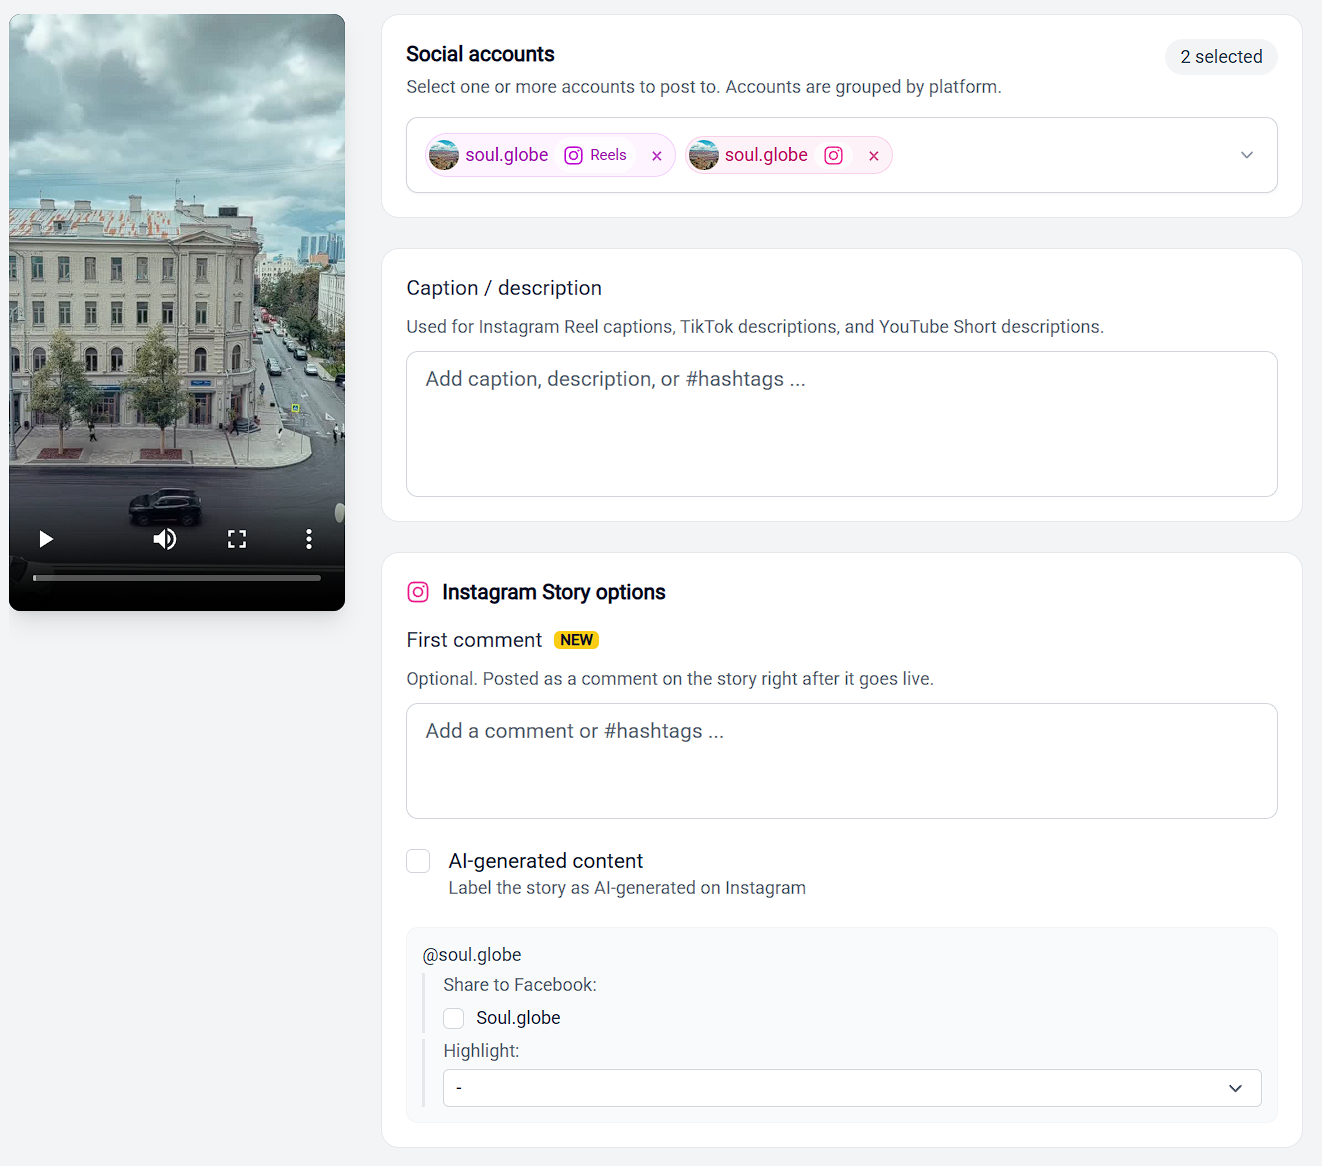
- Highlight — appears only if that account already has at least one Highlight album. It starts on -, meaning the Story is posted without being saved to a Highlight. Pick an album and the Story is saved to it as well as posted. The dropdown resets to - every time you open the scheduling page, so choose the album for each post rather than expecting your last choice to carry over. If you want the dropdown and it isn't there, create the Highlight on Instagram first, then reopen the scheduling page
The account in the card above has a linked Facebook Page but no Highlight albums, so only the Share to Facebook: row shows. An account with both gets the Highlight: dropdown underneath as well:
Stories don't use the Caption / description field. When a Story is your only destination, that field isn't shown at all. Anything you want visible on the Story itself goes in the design, using text and stickers in the editor.
If a sticker isn't available for an account
Instagram doesn't offer every interactive sticker to every account. If your design uses a Poll, Quiz, Question, Emoji Slider, or Countdown sticker that Instagram won't accept for one of the accounts you selected, an amber warning appears before you schedule, naming both the account and the stickers it can't use.
The warning is informational only and doesn't block scheduling — the post still goes out to the account you picked. Storrito raises it so you can decide before publishing rather than find out afterwards.
If you'd rather the sticker worked everywhere, you have two options:
- Remove the sticker from the design, so one Story works for every account
- Leave the design alone, deselect the account named in the warning, and post to that one separately with a version that doesn't use the sticker
This check runs on Stories only. Reels, TikTok posts, and YouTube Shorts don't carry interactive stickers at all, so nothing you do in the sticker panel affects them.
For what each sticker does and which ones Storrito supports, see Interactive Stickers For Instagram Stories.
Instagram Reel options
Reels differ from Stories in one way that trips people up: the Caption / description field above the options cards is the Reel caption. Write it there, not in the Reel card. The card notes this at the top, but it's easy to miss when a Story and a Reel go out together.
The card itself offers:
- Cover photo — optional. Click Upload cover to add a JPG or PNG cover image for the Reel
- Recommend on Facebook — on by default. This lets Instagram recommend the Reel to people on Facebook. It does not post the Reel to a Facebook Page
- Show Reel in Instagram posts — also displays the Reel in your profile grid
- AI-generated content — labels the Reel as AI-generated on Instagram. See How To Label AI-Generated Content
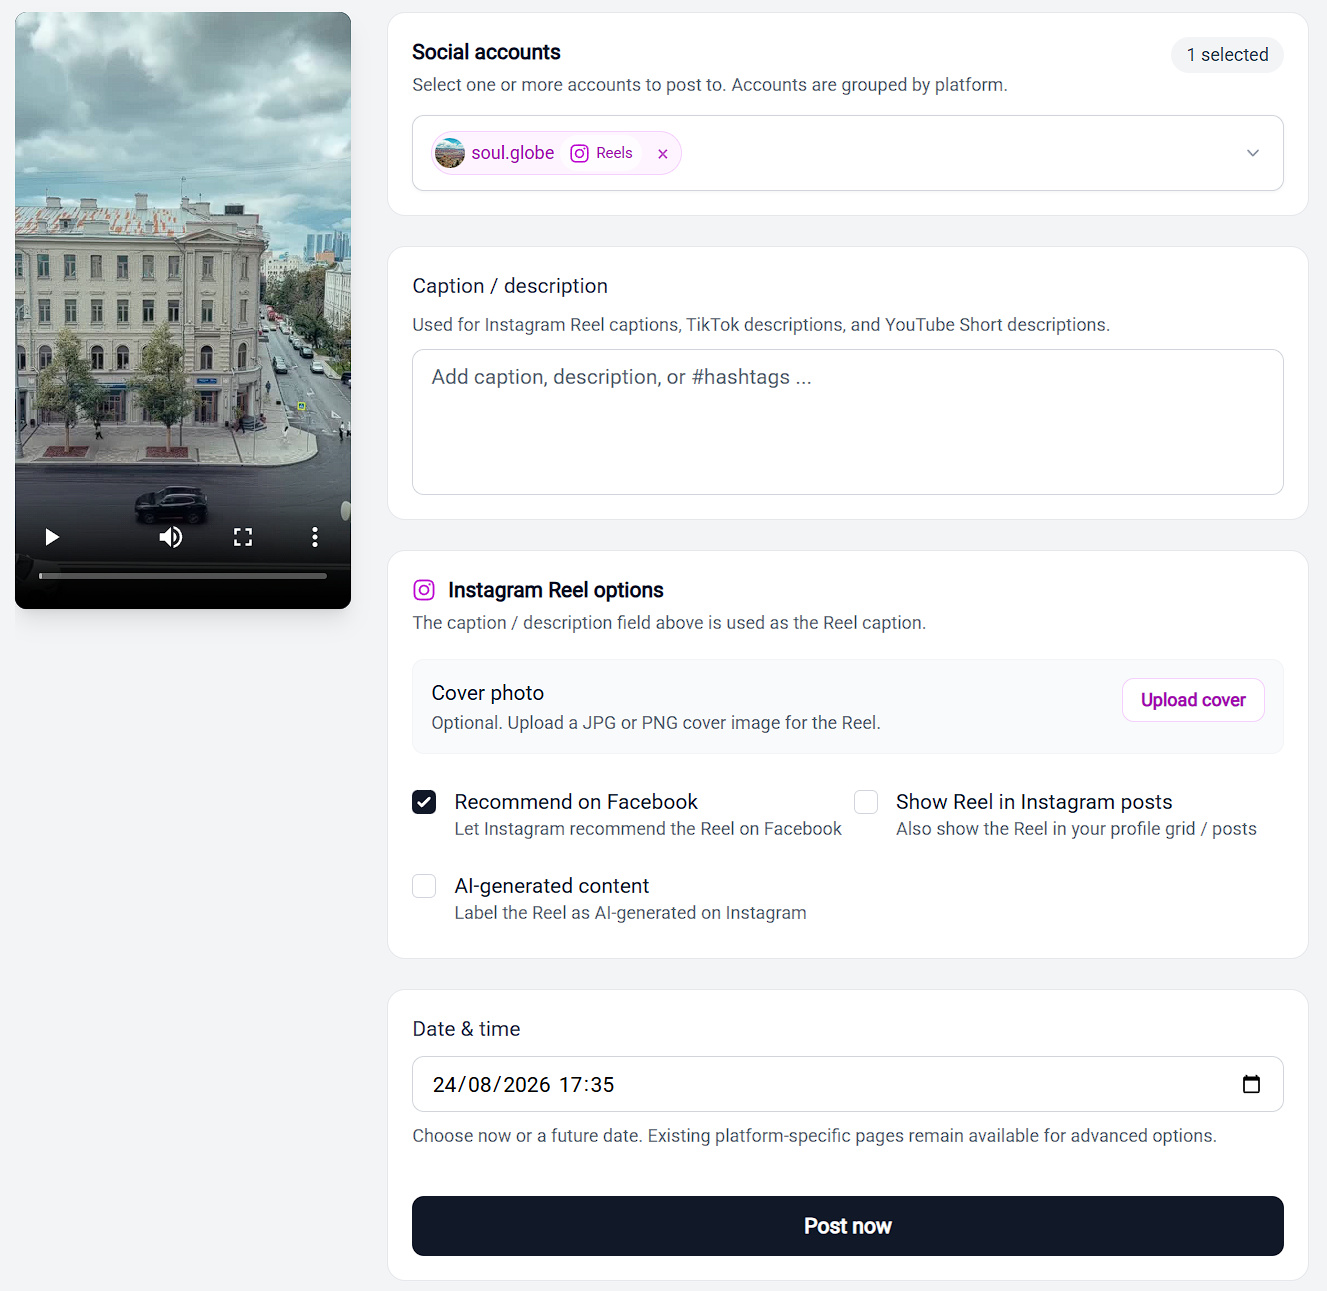
Storrito renders the video automatically before posting, so there's no separate export step.
You can change the caption, the date and some of the options of a scheduled Reel until Storrito starts posting it. See Can I Edit A Scheduled Reel?.
After you schedule
Scheduling activity on the same page lists each destination and its status: Scheduled → In progress → Live, or Failed if it didn't go out. Because Stories and Reels are separate destinations, one can succeed while the other fails. A Cancel link is available while a destination is still scheduled.
A posted Story later switches to Expired, which isn't an error — Instagram Stories run for 24 hours, and the row keeps showing when it posted. Reels and Shorts stay Live.
The post also appears on your Schedule page, where hovering it gives you Edit, Re-schedule, and Cancel. Each card carries its destination icons in the top left of the thumbnail and its status in the top right, so a crossposting Story shows a Facebook icon stacked under the Instagram one.
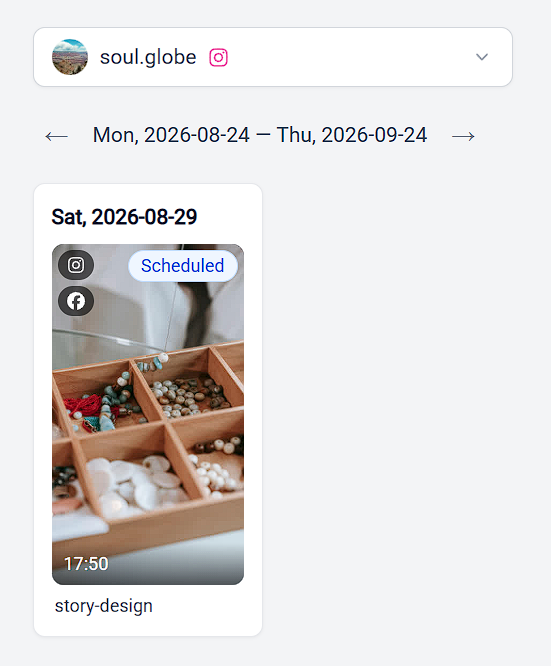
Scheduled posts only publish if your credit balance is positive when they're due. See Credit Pricing FAQ.
Tools
- Subtitle overlay
- Auto Post Instagram Stories
- How to Upload a Video to Instagram Story from PC
- Schedule Instagram Stories with the Link Sticker
- Instagram bio generator
- Upload and post Instagram Reels from PC
- Subtitle generator
- Instagram grid maker
- Schedule Instagram Stories
- Turn an MP3 into an Instagram Story video
- Can you schedule Instagram stories? Yes, with Storrito.com! (Here's How)
- Instagram Story bingo generator
- Storrito toolbox
- Instagram Story Planner (Scheduler)
- Instagram font generator
- Instagram Story 'this or that' generator
- Schedule Facebook Stories from PC
- Instagram Story Maker Online
- Trim a video
- Instagram carousel maker
- PDF to Instagram carousel
- How to schedule Instagram Reels
- How to add a story in Instagram from PC or Mac?
- Post Instagram Stories from PC
- Instagram Story tier list generator